Featured Post

Recurring Jobs

Recurring jobs are sequences of jobs automatically generated according to a schedule that you set up. The schedule can define days of the...

Popular Posts

Tuesday, March 31, 2020

Charts of Company Performance

The WorkWell Command Center displays charts that illustrate many aspects of your company's performance.  These range from revenue/bookings/profit charts to employee wage and productivity charts to charts that reveal which marketing efforts are most fruitful.

You will find several types of charts: graphs, bar charts, pie charts, and area charts.

Where Can I Find Charts?

Charts Page

Click on the chart icon     in the left column of page icons to go to the Chart Page.  Select the type of chart you want and the number of months.  There are a few dozen charts to choose from.

Quick Looks

At the top of the Dashboard page, the Quick Looks section provides you with numerous charts for Jobs, Customers, Leads, Quotes, Invoices, and Expenses.

The following is an example of a Customer Chart.  Click the     icon to rotate among a collection of Customer charts.  Click on the tabs (there are 6 - in a horizontal bar just under the top) to choose a different class of charts.  For example, click the 'Jobs' tab to see a collection of job-related charts.  Finally, to choose a timeframe, click on the TimeFrame widget at the very top - in the figure below it is labeled 'This Year'.  Click it to choose a different timeframe, like 'Last Year', 'This Quarter', 'Last Quarter', 'Last Month', etc.


Table Views

Many of the tables display a built-in set of charts.  To activate these charts, look for the button shown here.  Just click on it and charts relevant to the type of information in the table will slide onto the page.  For example, if you are on the Customer Tabular View, then the charts will be related to your customers.  If you are on the Services Tabular View, then the charts will be related to the services your company sells.  Etc.

Examples of Charts

Revenue & Profits

For Revenue & Profits you can display up to 6 graphs at once.  Select which graph(s) you want by clicking the checkboxes.  Also, choose how many months you want to cover.  You can get a 'cumulative' graph as well - click the 'Cumulative' checkbox.

Revenue

The Revenue bar chart shows you how much revenue your business produced in a given timeframe, along with how much has been paid, not paid, and how much is not paid and late.


Job Activity

The Job Activity graphs show a monthly view of the number of jobs your company has completed, the number of invoices and quotes sent, and the number of payments that are due or late, etc.

You can display up to 6 graphs at once.  Select which graph(s) you want by clicking the checkboxes.  Also, choose how many months you want to cover.  You can get a 'cumulative' graph as well - click the 'Cumulative' checkbox.


New Jobs

New Jobs is a monthly bar chart of your jobs over the last year.  You can view revenue, average revenue or number of jobs.  

Job Locations

Job Locations is a pie chart that shows you what towns your jobs have been located in.  If you run your cursor over the pie chart, whatever slice you touch will give you a count of the number of jobs in the town that slice represents.

Job Ratings

Track your job ratings.  This chart shows how many ratings you have, the average rating, and how ratings are distributed between 1 and 5 (the best) stars.


Job Sources

This pie chart shows you how these jobs came your way.  Were they the result of referrals from existing customers?  Maybe from visitors to your website.  Others may be the result of any advertising or referral sites you engage with.


Customer Status, etc

This pie chart shows you how many customers are assigned each status type.  You create the status types and assign them to your customers.  You can choose a timeframe - like 'This Year', 'Last Year', 'This Quarter', 'Last Month', etc.  If you run your cursor over the pie chart, whatever slice you touch will give you a count of the number of customers with the status that slice represents.


Who are Your Best Customers?

This bar chart shows you at a glance who your best customers are in terms of revenue, average revenue per job or number of jobs.  You can choose a timeframe - like 'This Year', 'Last Year', 'This Quarter', 'Last Month', etc.


New Customers

This bar chart shows month-by-month how many new customers you have won over the last year.  You can choose a timeframe - like 'This Year', 'Last Year', 'This Quarter', 'Last Month', etc.  For per Quarter timeframes, the horizontal axis is weeks rather than months.

Customer Category

This pie chart shows you what types of customers you have.  These are categories you have created and assigned to your customers.  You can choose a timeframe - like 'This Year', 'Last Year', 'This Quarter', 'Last Month', etc.  If you run your cursor over the pie chart, whatever slice you touch will give you a count of the number of customers in the category that slice represents.

New Invoices

This bar chart shows month-by-month how many new invoices you have issued to your customers.  You can choose a timeframe - like 'This Year', 'Last Year', 'This Quarter', 'Last Month', etc.  For per Quarter timeframes, the horizontal axis is weeks rather than months.


Invoice Status

This pie chart shows you the status of your invoices.  Use this to track how many unpaid invoices you have outstanding - especially those that are overdue or haven't been sent.  You can choose a timeframe - like 'This Year', 'Last Year', 'This Quarter', 'Last Month', etc.  If you run your cursor over the pie chart, whatever slice you touch will give you how many invoices have the status that slice represents.
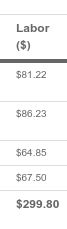

Worker Earnings

This bar chart shows the month-by-month earnings over the last year of one of your employees.  You can choose any employee.


This area chart shows the month-by-month earnings over the last year of all your employees.  You can see the relative wages of each of your employees.  The aggregate of all the wages is your total payroll.


Services

Want to know which of the services you sell generate the most revenue?  This area chart shows the month-by-month sales of all your services together.  You can easily see if any of the services have seasonal peaks and which are performing well for you.


The pie chart view also shows you the relative sales performance of all your services.  Choose how many months you want the chart to cover and the number of services displayed.  If you run your cursor over the pie chart, whatever slice you touch will give you the revenue from the service that slice represents.


New Leads

This bar chart shows month-by-month how many new leads you have won over the last year.  You can choose a timeframe - like 'This Year', 'Last Year', 'This Quarter', 'Last Month', etc.  For per Quarter timeframes, the horizontal axis is weeks rather than months.

Lead Stage

This pie chart shows you the source of your leads.  It tracks how you initially learned about the lead.  A source could be a referral site like Yelp or Thumbtack, or referrals from existing customers, or people that found you through your website.  You add/remove sources that you can then assign to your leads when you enter them into WorkWell.  You can choose a timeframe - like 'This Year', 'Last Year', 'This Quarter', 'Last Month', etc.  If you run your cursor over the pie chart, whatever slice you touch will give you a count of the number of leads assigned the source that slice represents.


Lead Funnel

The lead funnel provides an interesting way to view your lead stages.  It shows how successful you have been at converting leads into customers.  In the example shown, 17% of your leads are new and you haven't done anything with them other than enter whatever you know about them into WorkWell.  13% of them you have at least contacted.  15% have indicated some level of interest.  16% you believe to be real opportunities.  19% are in the proposal stage - you have quoted a price and are waiting for a decision.  17% are wins - they have booked work with you and can be converted into a customer at this point.


GPS Tracking


WorkWell gives you GPS tracking too!  With this great feature you can track where your work crews are located realtime and accumulate a history of their travel throughout the day.

View our Video Tutorial about GPS Tracking on YouTube.

How does it work?

GPS tracking relies on your workers using the Mobile WorkWell App on their smartphones while doing their daily work routine. Whenever a worker uses the WorkWell App on his/her smartphone, their GPS coordinates are gathered at regular intervals (typically every 5 minutes) and sent to the WorkWell Software server. You are able to observe these GPS locations on the WorkWell Command Center using its integrated Map application.

The lifetime of the GPS coordinates is typically about a week - older coordinates are automatically purged.


Show GPS Tracking

Click on the   icon (above the map) to view recent locations of a worker in the field. Worker locations are identified on the map via two types of markers. The single filled Star marker with the 'W' identifies the last known location of the worker. The small filled circle(s), also with the 'W', identify earlier locations. If there are enough GPS samples, you will be able to trace the travel route taken between jobs and see when workers arrive at and leave their job assignments.


Configure GPS Tracking

Click on the     icon (above the map) to change the setup for GPS tracking. You can choose which worker to track, specify a time interval, or limit the number of points and the minimum distance between points.


There are several setup parameters for GPS tracking. Here is a list.

  • Choose a Worker: Use the pulldown to select the worker you wish to track.
  • Show Only Last GPS Location: If you check this box, then only the last known location of the worker is displayed. If not checked, then the last know location is show along with any previous locations that are within the start/end time period you've selected.
  • Select the Start and End times. Only those GPS locations that occurred in the time interval will be displayed.
  • Choose the maximum number of GPS locations to display.
  • Choose a minimum distance between successive GPS samples - only samples located more that this distance apart will be displayed. Use a longer minimum distance to avoid showing GPS locations that are near one another.


Sunday, March 29, 2020

Online Booking

Online Booking is an easy way for you to allow your customers to schedule jobs themselves.
  • The Online Booking Widget appears on your business website
  • No extra charge to you and your customers
  • Completely optional
The idea is to enable your customers to book jobs themselves via an Online Booking Widget that WorkWell Software provides you.

To add the Online Booking Widget to your website, you must place a code snippet - a single line of 'HTML' code - on your website on the page you want the Online Booking Widget to appear. This code snippet is provided in the configuration set up under the 'Admin' menu (described in 'How Do I Add Online Booking to My Website?'). Whenever anyone visits the page on your website that contains this code snippet, the Online Booking Widget appears (it is immediately downloaded from the WorkWell Software server).
You may configure several details of the Calendar (described in 'Configuring the Online Booking Widget').
  • Enable/Disable the Online Booking Widget
  • Setup a service radius (driving miles) from your home base
  • Allow prices to be shown and optionally a minimum price
Whenever a visitor to your website wants to schedule a job for themselves, they enter their information on the Online Booking Widget. This includes the services they want to buy, the date and available timeslot they want you to do the work and their contact information - Name, Phone, and Address are required.

You receive notification within the WorkWell Command Center whenever a visitor schedules a job. You will see a red circle with a number in it next to the 'bell' icon:    at left. (This is described in 'Notification of Job Requests') You may want to contact this new customer to confirm the job.

Click on the 'bell' icon:   to manage the incoming job requests. This will open the Job Request Manager.


Carefully review Job Requests. To accept a job, you must click the 'Create a New Job' button to convert the Job Request into a new Customer (if the customer doesn't already exist in your customer database) and a new Job.

The Online Booking Page (on your website)

Below is an example of the Online Booking widget that visitors to your website will see.


To book jobs, visitors must do the following:

  1. Select the services they wish to purchase.
  2. Select a Date for the work to get done.
  3. Select a Timeslot on that date.
  4. Enter Contact Information - Name, Address & Phone are required.
  5. After all the information is entered, click 'Finished'.
The information in the form is then checked for errors and the Address is looked up on Google Maps to determine how far it is to drive to. If the Address is outside your company's service area, a warning message is produced (the Job Request is still accepted).

After the checks are completed, the visitor is presented with a Thank You Message and the information is sent to your WorkWell Command Center. You will receive a notification - the 'Bell'   on the Command Center will be colored red and will increment its Job Requests count. Click on the 'Bell'   to open the 'Job Request Manager' page. Review the Job Request and we recommend you contact the customer. To accept the Job Request, click the 'Create a New Job' button.


How To Get the Online Booking Page on Your Website?


To add Online Booking to your website, you must place a snippet of code (a single line of 'HTML') on your website on the page you want Online Booking to appear on. Whenever anyone visits that page, the code snippet automatically downloads the Online Booking widget from the WorkWell Software server.

You will find the snippet on the Setup Info form. Open this form by selecting 'Setup Info' from the   'Admin' pull-down menu at the top.


Then go to the 'Online Booking' section. Within the textbox labeled 'Code that you copy into your website' (it will look like the example below), you will see a short snippet of HTML code. Copy this to the page of your company website that you would like the Online Booking widget to appear. If you don't know how to do this, ask your website manager to do this for you.


You will also want to place a prominent button near the top of your website's main page (and perhaps on every page). When clicked, the button must take your visitors to your Online Booking page. A button that looks, for example, like the following is typically used.


You Manage Which Jobs Appear on your OnLine Schedule

You create, view and manage 'Available Job Timeslots' on the Command Center Scheduler along with your jobs and reminders. They are time periods that, when you create them on the Scheduler, are automatically displayed on the Online Booking Widget on your website. Typically they are gaps in your schedule that you hope visitors to your website may select and 'Self Book' jobs they would like your company to do.


Available Job Timeslots have a Start Date & Time and an End Date & Time. To display and manage them, choose Event Type 'Available Job Slots' or 'Jobs & Available Slots'. The first will display only the Available Job Timeslots you have created. The later will also display regular Jobs - but you will be able to distinguish between them by their color. Displaying Available Job Timeslots and regular Jobs together is helpful because it shows when you are already scheduled (the regular jobs) along with when you would like to be scheduled (the Available Job Timeslots).
  • To create a new 'Available Job Timeslot', just double click on the Scheduler at any date & time. An 'Available Job Timeslot' event will appear.
  • To modify or delete a particular 'Available Job Timeslot', double click on it. Within the 'Available Job' form that pops up, you can change the start date & time and end date & time. Or click the form's 'Delete' button to remove it.
  • You can also change an 'Available Job Timeslot' date & time by just dragging it around the calendar.


Your Customers Schedule Themselves

To book jobs, visitors to your website Online Booking Widget must do the following:
  1. Select the services they wish to purchase.
  2. Select a Date for the work to get done.
  3. Select a Timeslot on that date.
  4. Enter Contact Information - Name, Address & Phone are required.
  5. After all the information is entered, click 'Finished'.

Customer Selects One or More Services 

The top section of the Online Booking Widget lists the services your company sells and optionally the prices. These are the services you have defined via the Command Center Services Table, and are the same services you choose from when you create line items for jobs you create.


Your website visitors can choose one or more of these services to buy from you using the 'Select One or More Services' menu at the top. Each service they select is listed along with its price and the total price if they select more than one service.

You may configure the Online Booking Widget to omit prices. You may also configure your Online Booking Widget to show a minimum job price. Do this on the 'Setup Info' form available under the 'Admin' menu at the top of the Command Center.


Customer Chooses a Timeslot

The sections labeled 'Step 2' and 'Step 3' show when you are available to do jobs. You decide when (date and timeslot) visitors to your website can schedule jobs. You do this by adding, modifying and deleting 'Available Job Timeslots' on the Command Center Scheduler. 'Available Job Timeslots' automatically appear on the Online Booking Widget on your website after you create them on the Scheduler.

Your website visitors choose the day they want the work done - they just click on a date on the calendar. A list of available job timeslots for that day appears below the calendar. They then choose a timeslot by clicking on it. If no timeslot is suitable for them, or none are listed, then the visitor must choose a different date.

You must be diligent to manage the Online Booking Widget so that Timeslots are available for your visitors to choose from. Use the Scheduler to add 'Available Job Timeslots'. Review 'Manage What Jobs Appear on the Online Booking Widget' if you are unclear how to do this.


Customer Enters their Contact Information

In the 'Contact Information' portion of the Online Booking Widget, your visitor provides Name, Address, Phone, and Email and indicates if the Phone Number can be texted to.

Name, Address, and Phone are required - the Job Request cannot be submitted if they are not provided.


Customer Submits - Clicks 'Finished'

When your prospective customer is finished filling in the information, he/she clicks 'Finished'.

If any required information was not provided, they are prompted to finish the form. Required information includes Name, Address, Phone, and a Timeslot.

If the address entered into the Contact Info section is outside your service area, then a warning is presented. You might decide to reject the job or to charge an extra travel fee. This is an optional feature that you enable when you configure Online Booking. Estimated road driving distance (WorkWell consults Google Maps in the background) is used when determining if the address is within your service area.


Jobs From your Online Calendar Appear as Job Requests in the WorkWell Command Center

Open the Command Center 'Job Request Manager' by clicking on the   icon.

Job Requests are displayed - these are the job requests that visitors to your website submitted from the Online Booking Widget.
  • If there are multiple Job Requests, you can cycle through them by clicking the 'Next' button.
  • If you approve of the job request, click 'Create a New Job' - a new Customer & Job will be created from the Job Request information.
  • If you do not approve, you can remove the Job Request - click the 'Remove' button. Be sure to contact the customer to let them know.
  • Whether you approve or not, it is good practice to contact the customer to confirm.


Friday, March 27, 2020

Credit Card Processing


WorkWell Software now handles credit card transactions.  Now you can accept payment from your customers via credit card.  You can do this at your office using the WorkWell Command Center or at the customer site using the WorkWell Mobile App.

You'll be able to accept all major credit cards!        


Credit Card Processing

WorkWell Software has partnered with Stripe (www.stripe.com), one of the leading credit card processing companies for internet businesses. Stripe is used by Target, Lyft, Shopify, Square Space, DocuSign and millions of other businesses.

You'll need to set up a Stripe account of your own first before you can use the WorkWell Command Center and Mobile App to process your customer credit card transactions. If you are just getting started, go to www.stripe.com and sign up for an account. Once you have been approved by Stripe, you will be able to process credit card transactions in the WorkWell Command Center and Mobile App.

WorkWell will be permitted (if you approve) to 'connect' to your Stripe account in a limited fashion that does not reveal any of the confidential banking information that you provide to Stripe. WorkWell Software never has access to your Stripe account information - your sensitive bank information is between you and Stripe. In fact, when you start a credit card transaction from the WorkWell Command Center or Mobile App, you are initially transferred to the Stripe server so you can sign in to your Stripe account. Stripe will securely authorize you and then return control to WorkWell. You then enter your customer's credit card information.  Stripe then takes over again to process the transaction.

This integration between WorkWell and Stripe has many great benefits for you

  • All of your customer interaction is available in one convenient place - your WorkWell Command Center and Mobile App.
  • WorkWell never has access to your sensitive banking information. This is between you and Stripe.
  • WorkWell integrates credit card payments with invoicing and payment tracking.
  • Stripe processes your transactions to PCI Service Provider Level 1 standards and all data are encrypted. This is the credit card industry's highest level of security and includes ongoing programs to ensure continual compliance with all security procedures.


Stripe will usually deposit payments to your bank account within 1 or 2 business days. For example, payments received on a Wednesday are paid out by Friday, while payments received on a Friday are paid out by the following Tuesday. Your first payment will likely take 7 to 10 calendar days.

Connecting with

To charge your customer's credit card for the services you've provided, open the job's edit form. 


Select the Payment section of the form.


Click on the 'Connect with Stripe' button. This will transfer you to the Stripe server so you can securely log into your Stripe Account. 


You will be presented with a form like shown below.  Click on the 'Sign in with Stripe to connect' button.  This will authorize WorkWell to connect with your Stripe Account in a limited fashion.


Next, you will be asked to log in to your Stripe Account.  This login is actually occurring on the Stripe server and is very secure.  WorkWell is not able to see your login and password.


Note: If you previously logged into your Stripe account, your browser will remember you for a while. In this case, Stripe will automatically connect and you will not be required to do the last 2 steps.

Enter your Customer's Credit Card Information

After you have successfully logged in, (this is usually fast, but sometimes takes half a minute or more), the Credit Card Entry form shown below will pop up.  The customer's name, phone number, and zip code are pre-filled for you.  Enter the credit card number, expiration date (format: MM/YY) and the 3 digit CVC code. Click the 'Pay' button and Stripe will process the charge. Usually within seconds, but sometimes up to half a minute, you will receive a pop-up response indicating whether the transaction went through successfully or not.


Stripe then completes the transaction and arranges to have money transferred from your customer's credit card to your bank account. Stripe handles all sensitive information and does so at the highest industry standards of security.


Using your WorkWell Mobile App to Accept Credit Card Payments


Payment processing is especially easy on the WorkWell Mobile App for Android and iOS phones & tablets.  There are just 4 Simple Steps

  1. Open the job you want to take payment for.  [If you want to send your customer an invoice, scroll to the Invoice row and tap on the Invoice toggle switch.  Tap the Invoice icon to bring up the Invoice Page (as shown above).  Email the invoice to your customer if you wish - just tap on the email icon.  You don't have to do this now - you can do send the invoice at any time.]  To process a credit card, click on the Credit Card icon.  
  2. The Payment page summarizes the services sold and the amount.  If correct, tap on the "Connect with Stripe" button.  
  3. This takes you to a form on Stripe's server where you can securely log into your Stripe account.
  4. Finally, you are presented with a Credit Card form.  Enter your customer's credit card number, expiration date and 3 digit code.  You can override the amount you charge by entering a dollar amount in the 'Amount ($)' box.  Tap on 'Submit Charge' and Stripe will take it from there, with the money deposited in your account within a day or two.


Monday, August 26, 2019

Tracking Worker Earnings


The WorkWell Command Center tracks your worker earnings for you - automatically.  Additionally, it enables you to easily create per-employee pay plans based on Hourly Earnings, Commission or Fixed pay per job.  OR, any combination of the 3.  What's more, you can modify an employee's pay plan for any given job.

For your hourly employees, WorkWell tracks their work time and calculates their wages over any period you want.  Wages can be broken down per job too, giving you a detailed accounting of all the work they have done - and all the wages they are due.

You can set up pay plans that incentivize your workers with commissions and upsell bonuses.  Offer your lead workers a stake in your business by paying commissions - a percentage of the jobs they do.  And, offer everyone fixed or commission bonuses for additional unplanned services that they sell customers while at the job.  You easily enter and track this information via the WorkWell Command Center, rendering a complex weekly chore into a simple 5-minute task.


Earnings Report

It is easy to determine what you owe your workers over any time period.  When you need to, you can also find all the details you need to track down what work each has done and when and also determine how productive they have been.

Open the Staff Management Table to see employee earnings.  To open this table, choose 'Staff' from the 'Admin' pulldown menu in the navigation header at the top.

Staff Management Table

Bring your attention to the 'Earnings', 'HoursWorked' and 'Jobs' columns.  The information is calculated over the period you have selected via the 'Earnings Period' selector at the top and considers only jobs with the status you have selected via the 'Earnings Job Status' selector.  In the example shown here, these columns reflect earnings for all paid jobs completed this week.

Employee Earnings Columns

In the 'Jobs' column, the green badges show how many jobs the employee worked on.  If you click on a badge, the Job Management Table will appear with jobs the employee has worked on.  This provides detailed information about the jobs, enabling you to research in detail that employee's compensation.

Below is the Selector that appears when you click the 'Earnings Period' button.  Choose among the preset date periods or choose 'Custom Period' if a preset date doesn't meet your needs.

Earnings Period Selector


If you choose 'Custom Period', the Start/End Date Selector shown below appears.  Click in the Start input box and a date selector will pop up from which you select a Start Date.  Likewise, click in the End input box to enter the End Date.


Custom Period Selector
Normally only jobs that have been completed and are Paid are included in the wage calculations.  You can choose to include all jobs that have been Invoiced and are finished but not necessarily paid yet (click on 'Invoiced') or all Finished Jobs that are not necessarily invoiced or paid yet.  Make your selection via the Job Status Selector that appears, as shown below, when you click the "Earnings Job Status" button.

Job Status Selector

Earnings Charts

Worker earnings are sometimes best viewed as charts.  To view the charts, click the 'Charts' button and charts will slide up from the beneath the Staff Management Table.  You may select among a few chart types.
Shown below is a Bar Chart of an employee's earnings, month-by-month, over the last year.  Select the employee whose earnings you wish to review.

Earnings of Individual Worker

You may choose any employee or choose all the employees as shown below.

All Worker Earnings
An Area Chart view, as shown below, shows all your employee earnings together on the same chart.

All Worker Earnings as an Area Chart


How are Earnings Calculated

For each job a worker is assigned, three parameters come into play for determining that worker's earnings.
  • Hourly Pay Rate.  
  • Commission Percentage
  • Fixed Amount for the Job
The Hourly Rate and Commission are shown in the Staff Table and can be modified in the Employee Form.  These are default values for determining employee wages.  When you create a new Job, these values will appear on the Job Form.  If an employee always has the same Hourly Rate and Commission, then simply use the default values on the Job Form and you don't have to do anything.  But if they differ for a particular job, you can change the rate and/or commission on the Job Form.

An Employee Form is shown below, with entries for the Hourly Pay Rate and Commission for that employee.

Employee Form - with Pay Setup

These 2 entries from the Employee Form are shown below.  They are part of your Employee setup and normally don't change until you give the employee a raise or change their role.
Pay Setup Options - Hourly Rate and Commission

As mentioned, when you create a job you can optionally enter different hourly, commission and/or fixed wage parameters.  These are located in the Worker Selection portion of the Job Form as shown below.


Notice that you can change any of these values for any of the employees assigned to the job - just click on the pencil icon next to any value.  Typically you would probably just accept the default values that are automatically assigned.  The worker's pay for the job is given in the 'Wage' column and is based on the duration of the job and the 'Hourly', 'Commission' and 'Fixed' columns.


For jobs consisting of multiple services, worker pay is also broken down for each line item.  In the Line Item Table shown below, the Labor Cost column enumerates the wages per service sold.

Line Items for a Job - Labor Cost is Broken Down per Line Item

Line Item Table - Labor Cost Column

The Line Item Table's Labor Cost column is shown at left.  It provides a per-line-item breakdown of the wages calculated for the job.  This example shows that $299.80 is owed in wages to the 3 employees assigned to the job.  This is further broken down across the 4 line-items - the line-item duration and pre-tax price are used to determine the wage earned for the line-item.  This level of detail is essential when you are interested in the profitability of each service (the line-items) you sell.