Featured Post

Recurring Jobs

Recurring jobs are sequences of jobs automatically generated according to a schedule that you set up. The schedule can define days of the...

Popular Posts

Sunday, April 12, 2020

Recurring Jobs


Recurring jobs are sequences of jobs automatically generated according to a schedule that you set up. The schedule can define days of the week or month with flexible combinations of day, week, and month. You also choose how the sequence will end - either at a specified future date or after the sequence grows to a certain number of total jobs.

You set up a job at a given date and time that starts the sequence. The job you create is then repeated automatically according to the schedule.

After you've set up the recurring job sequence, you can modify individual jobs of the sequence, or edit all a particular job of the sequence and all future occurrences.


Create a Recurring Job

You can add recurring jobs from the Job Table page or from the Scheduler page or from the QuickLinks menu.

  • Job Table: go to the Command Center's Job Table page. In the header of the table, select 'Add New Recurring Job' from the Tools menu.
  • Scheduler: go to the Command Center's Scheduler page. Choose the 'Recurring Job' event type. Double click at the data & time that you want the Recurring Job to begin.
  • QuickLinks: open the QuickLinks menu (click 'QuickLinks' at the very top of the Command Center). Click on 'Add a New Recurring Job'.


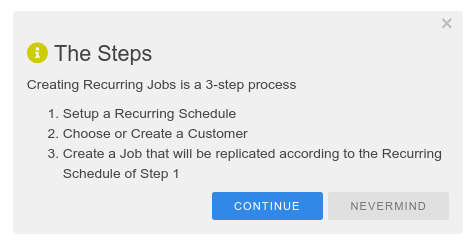
The popup shown above appears and outlines the 3 steps you will follow. Click 'Continue'.

  1. The 'Recurring Job Schedule' form will pop up, allowing you to create a schedule that repeats according to a monthly/weekly/day pattern of your choosing.
  2. Next, the 'Select Customer' search form will appear from which you can select an existing customer or create a new customer.
  3. Finally, the New Job form will pop up. Define the job that you want - but unlike normal single non-recurring jobs, this job will be automatically be assigned a schedule and duplicated in accordance with the monthly/weekly/day pattern you defined in the initial recurring job scheduling step.

Recurring Job Schedule

The 'Recurring Job Schedule' form allows you to create a schedule that repeats according to a monthly/weekly/day pattern of your choosing.

The form has 4 sections.
  1. Select a date for the jobs to begin. Also, select the start & end time of day - every job that is generated will occur at these start and end times, but of course on different days.
  2. Choose the type of repeating pattern - weekly, monthly, monthly/weekly/day-of-week or monthly/day-of-month
  3. Specify the details for the pattern type you selected.
  4. Choose how the recurring job sequence will eventually stop. Choose either a maximum number of jobs to generate and/or the job stop date. If you choose both, then jobs will cease to be generated when the first of either of them occur.

Repeat Type: Choose the type of repeating pattern that best meets your requirements

You have a lot of flexibility to describe exactly how you want your jobs to repeat.  Choose among the four different pattern types that are supported.

Select a Repeat Type from the pull-down menu.
  • Weekly
  • Monthly
  • Weeks & Days of the Month
  • Days of the Month
When you configure a repeating pattern, you can verify that it creates the expected results by viewing the jobs on the Scheduler - make sure you choose 'Recurring Jobs' to be highlighted.

A. The Weekly Pattern

With the Weekly Pattern, you select which days of the week the job is done.  You also select how many weeks before the pattern repeats. In the example shown, the job repeats every other week (repeat interval is 2) on Tuesday and Friday.  If the repeat interval were 1, then the job would take place every Tuesday and Friday.
As another example, you could repeat the job on every 3rd Wednesday (repeat interval 3 and select only Wed).

B. The Monthly Pattern

Use the Monthly Pattern for less frequent jobs.  Choose a day of the month and how many months before the pattern repeats.  In the example shown, the job is scheduled for the second Monday of every 4th month.

C. The Weeks and Days of the Month Pattern

With this pattern, you choose which months, which weeks of these months and which days of these weeks.  In the example shown, the job occurs every Wednesday of the third week of March, June, and November of every year.

D. The Day-of-the-Month Pattern

This is a variation of the previous monthly patterns.  You choose one or more days of any combination of months throughout the year.   In this example, the job occurs on the 8th and 21st of March and August of every year. 


Recurring Jobs via the Scheduler

To show recurring jobs on the Scheduler, choose the 'Recurring Jobs' Event Type.  This will display only jobs that are recurring.  Alternatively,  choose 'Jobs' and also select the 'Recurring Jobs' Highlight option. This is illustrated in the example shown - all jobs are displayed but recurring jobs are highlighted red to distinguish them from ordinary jobs (colored blue).

To create a new recurring job, first choose the 'Recurring Jobs' Event Type so that only recurring jobs are shown. Then, double click within the schedule at the date/time that you would like the recurring job sequence to begin. You will then walk through a 3-step procedure for creating a recurring job sequence.

To edit an existing recurring job, first make sure that it is visible on the scheduler - choose the 'Recurring Jobs' Event Type OR choose 'Jobs' and choose the 'Recurring Jobs' Highlight option. Then double click on the recurring job event. The 'Edit Job' form will appear. You will have the option of editing just that job or have the edits apply to all the jobs in the recurring sequence.


How Do I Know if a Job is Recurring?


The example above shows the Job Form for a job that happens to be part of a recurring job sequence. Notice the message at the top, under the title: "This is a Recurring (repeating) Job". Notice also at the bottom, there are a 'Cancel Recurring' button and a note describing this particular sequence: "Repeats on the 4th Sunday of every month".

The Scheduler is another way to easily distinguish Recurring Jobs from ordinary jobs.  Choose the 'Highlight Recurring Jobs' mode on the Scheduler and jobs that recur will be red - those that do not will remain blue.

Modify a Recurring Job Sequence

If a Job is part of a recurring sequence, then whenever you open the job to make changes you will be prompted as shown above.

Editing or Terminating Recurring Jobs

Choose one of the following:

  • Just this Job: changes will apply only to the job you selected.
  • This Job and All Future Jobs in the Series: changes will apply to the job you selected and any jobs of the sequence that occur in the future.
  • This Job and All Finished Jobs in the Series: changes will apply to the job you selected and any jobs of the sequence, past or future, that have been completed (their status is 'finished').

For example, you might want to delete a job but not any of the other jobs in the sequence. Alternatively, perhaps you want to add a lineitem for a job and all of its siblings in the sequence that occur after it.

You cannot change the job sequence's repeat schedule. Instead, you cancel the existing job sequence and create a new one. Follow these steps:

  • Open the job that you want the change to begin at.
  • In the popup (shown above) that first appears, select the "This Job and All Future Jobs in the Series" option.
  • The Job Form will open.
  • Terminate the sequence by clicking the 'Cancel Recurring' button at the bottom of the Job Form.
  • Click the Delete button - the delete will apply to this job and all jobs remaining in the sequence.
  • Create a new recurring job in its place with the new repeat schedule you want.
To delete a job and all its future siblings, select "This Job and All Future Jobs in the Series" in the Repeating Job popup. Then in the Job Form than pops up next, click delete.


Tuesday, April 7, 2020

Reminders & Notifications


The WorkWell Command Center provides several types of reminders that keep you informed of any tasks or events that you need to keep track of.

Action Items and Followups are special reminders that you set up yourself.  Many built-in reminders also exist to keep you apprised of what is going on in your business.  Examples include jobs whose payment is late, invoices that you haven't sent, bills that you haven't paid, outstanding quotes, etc.

Action Items

An Action Item is a custom reminder that you create and configure to remind you of something at a particular date in the future.  Use them so you never forget commitments you've made to your customers or leads (potential customers).  An Action Item is a detailed reminder that includes the following:
  • Who is responsible for responding to and completing the action item
  • A category
  • Optionally, a note with the details of what you need to remember
When an Action Item is due and the responsible person completes it, they should also close it so the system knows the Action Item is completed.

Notice in the screenshot below that Action Items are managed from a list located within the Customer Form.  This is where you create new Action Items and modify or delete existing action items.  Only Action Items pertaining to a particular customer appear here.  To see all Action Items, regardless of which customer they are for, the Timeline and Action Item Lists on the Dashboard are the places to look.

Click on the  icon to open the Action Item List. Click on the  icon to close it.


Action Items are listed chronologically. Those that are scheduled for furthest in the future are at the top; furthest in the past are at the bottom.

Action items can be filtered by category, status and/or due date by selecting from the pull-down menus at the top of the Action Items list.  A couple of examples are shown to the left.

Use the Icons at the top and within each row to manipulate the Action Items list.
  • You can edit an action item in the list by clicking on the  icon. An 'Edit Action Item' form pops up that allows you to modify or enter new information.
  • To delete an item from the list, click on the  icon.
  • To add a new item to the list, click on the  icon.
  • Close the list by clicking on the  icon.
  • Open the list by clicking on the  icon.
  • Open action items are labeled, on their left, with the  icon. Closed action items are labeled with the  icon. Click on an action item's  icon to change between the Open and Completed status.
  • To delete all completed action items, click on the  icon at top-right (not the ones at the left of each completed item). Beware - this will delete all checked action items (you will be prompted to verify that you actually want to delete them).


The Action Item Form looks like the following.  Select the employee you've assigned to be responsible for this Action Item.  Select a date and time the Action Item is due.  Optionally enter a description of the action item and anything that you want to recall about it - such as why the action item is being created and what you need to do when it becomes due.


Choose Category using the pull-down menu.  If the desired category doesn't already exist, create it by clicking on the '+' icon.


Use the WorkWell Mobile App to stay on top of things even while traveling and working at customer sites.  You can keep track of your Action Items, make changes to them and add new ones too. 
WorkWell Mobile App - Action Items
You have several options to control which Action Items are listed. 
  • Choose to track only Action Items that are open, just those that are closed or all of them.  
  • List only Action Items assigned to you - or all of them.  To see all of them you must be assigned permission (see Employee Privileges).
  • Choose a time-period: Daily, Weekly, or Bi-Weekly.  Move forward and backward a time-period at a time by tapping on the  and  icons. Go to the current time period by tapping on the   icon

Followups

Like Action Items, Followups are custom reminders that you create.  But they are much simpler than Action Items.  Followups consist only of a date - there isn't even any textual explanation for what the followup might be for. Followups are intended to catch your attention. As their due dates approach, warnings are issued within the Dashboard and also the Scheduler and Table Management views. If their due date passes, then late notifications are issued.
To create a Followup, just select the 'Followup Requires' button within the Customer Edit Form and select a future date.  When you have acted upon a followup, remove it by sliding the 'Followup Requires' button to the left (or you could instead give it a new date).


Jobs and Leads may also have Followups.  You create/remove them from the Job Forms and Lead Forms.

Reminder Notifications


The lowermost icons in the vertical navigation bar bring you to pages with reminder information.  The badges next to the icons are notifications indicating how many items on their respective pages that may require your attention.
      •   icon brings you to a Timeline view of all your action items.  5 are due today and 12 are late.
      •   icon brings you to a Timeline view of all your followups.  7 are due today and 16 are late.
      •   icon brings you to the Job Request page supporting your Online Calendar.  3 job requests are queued up.
      •   icon brings you to the SMS Text Manager.  37 sent messages and 31 reply messages exist.

Reminder Notifications - Tabular Views

Followup status is reported in the 'Reminder' column of the Customer Table like shown. The Bell  icon indicates a Followup while the  icon indicates one or more Action Items (how many is indicated in the badge next to it)
  • If the followup is due today, it's icon is colored yellow.
  • If it is green, this indicates that the followup is not yet due. If colored bright green, there is at least a week to go before it is due. If light blue-green, then there is less than a week.
  • If it is red, this indicates that the followup is due. If colored bright red, it is overdue by at least a week. If pink, it is overdue but by less than a week


Reminders on the Scheduler


Reminders on the Dashboard

The Dashboard collects all the reminders and presents them to you in organized lists and Timelines.

Activity Overviews

Activity Overviews provide a summary of several types of activity.
Activity-TypeExplanation
Top Action ItemsThese are action items not associated with particular customers or leads. You might use these action items as reminders of appointments, staff vacation days, need to buy supplies, particular bills that need to get paid, etc.
Customer Action ItemsThese are collected from action items created for your customers.
Lead Action ItemsThese are collected from action items created for your leads.
Pending JobsThe jobs that are scheduled, but yet to be worked on.
Unpaid JobsCompleted jobs that are not yet paid.
Unpaid ExpensesExpenses that are not yet paid.


Unpaid Jobs

This is a chronological list of all the unpaid jobs.  Important details of each job are provided, including when the job was completed and the Payment Due Date.  Jobs with late payments are highlighted in red with the number of days late indicated.

Click on a job item to activate it - a job form will pop up with detailed information that you can view/edit.


To-Do Lists

To-Do Lists provide a summary of the activity that essentially have deadlines. Only activity that is scheduled for the timeframe you have selected is considered.
  • Choose the timeframe via the 'When' widget in the header.
  • Options are: 'Today', 'Tomorrow', 'This Week', 'Next Week' and 'All'.
  • If you choose 'All', then all unfinished activity that has been scheduled up to Today is listed.
  • Activity is listed in sorted order - you can choose to sort based on 'Date' or 'Name'.

There are many To-Do Lists.
  • Customer Followups.
  • Job Followups.
  • Lead Followups.
  • Unsent Invoices.
  • Pending Invoices.
  • Pending Quotes.
  • Active Customer Action Items.
  • Active Lead Action Items.


Saturday, April 4, 2020

Electronic Signature


Any invoice or quote you create for a customer job is electronically signed, automatically,  with the signature of the worker assigned to that job.  The WorkWell Command Center stores an image of your signature and the signatures of all your workers.

Electronic Signatures on the WorkWell Mobile App

With the WorkWell Mobile App (on your iOS or Android phone or tablet), your employees can sign invoices/quotes electronically.  Your customers can too!

The signature of the worker responsible for the job is automatically applied to the invoice.  It is stored electronically (after having been set up previously within the WorkWell Command Center) and automatically inserted when you create an invoice.
Capture Customer Signature for the Invoice

The WorkWell Mobile app allows your customer to sign the invoice too.  If your customer is available at the job site, you can have them sign the invoice with their finger as shown in the screenshot above.  Your signature and the customer signature will be applied near the bottom of the invoice that you email the customer.  The screenshot below shows the bottom of such an invoice.

Electronic Signatures on the WorkWell Command Center

With the WorkWell Command Center, your employees can sign invoices/quotes electronically, but your customers cannot.  Customer signing of invoices is a feature of the WorkWell Mobile App but is not available with the WorkWell Command Center.  Because you typically use the Command Center at your office, the customer is not likely to be available to sign anyway.


Invoices (and quotes) that you generate using the Command Center will display your company's signature - as shown above.  Specifically, the signature of your employee responsible for the job is displayed.  You can choose a different signature - while the invoice/quote is in edit mode, use the signature selector to choose the correct employee signature to apply.  The signature will appear on the invoice/quote that you save, print or email - like in the screenshot above.


Setup Employee Signatures

To add/change an employee's electronic signature, you must be the WorkWell Command Center administrator.  Open the staff table (available under the 'Admin' pull-down menu at the top).  Then open the 'Employee Edit' form for the employee whose signature you want to add/change.  Then have your employee enter his/her signature.  In the Employee Form, you will see the signature section.

Use the 'Enter your signature' widget on the Employee Edit form.  First, clear any existing signature and then, using the cursor, the employee carefully enters his/her signature. It might require a couple of attempts to get the signature just the way he/she wants it. Just 'Clear Signature' and try again. Press 'Accept Signature' when it is to your liking.


Friday, April 3, 2020

Searching


The WorkWell Command Center gives you several ways to search for information.  You can find almost anything hidden away in your Job, Customer, Lead, Worker, Quote, and other types of data.

Quickly Find Almost Anything

Try the Global Search tool  located at the top of the navigation column on the left of every page. With Global Search, you enter a search keyword (and optionally a second search keyword) and it locates all data records (Jobs, Customers, Leads, Quotes, Workers, & Expenses) that have any matches for it.  You will even be able to find customers for whom you have entered call logs, action items or notes.  So it does dig deep into the data as it looks for matches to your search queries.

Global Search Tool
You can narrow the search by choosing a date range and full or partial matching. Partial matches ignore whether or not there are capital letters and also accept word fragments as search keywords.

Records that match are listed as clickable links. Click on any of the links and the corresponding record's Form will pop up, providing you full information and allowing you to edit the record.

Table Searching

Table searches are even more powerful, but limited to the type of data represented in the table you are searching.  If you are looking for Job-related information, then search within the Job Tabular View.  Similarly, if you are interested in Customer information, use the Customer Tabular View.  You get the idea.

Table-Wide

Table-wide search finds any information contained in the table, regardless of row or column the information is in.

Table Search - Global


Find the Table Search box within the table header (it has the  and  icons and 'OR' at the left). Enter your search query (word, multiple words or partial word(s) to match your information as if you are doing a Google search). Then click on the  to activate the search.

Only those rows of the table with information that match your search query will be shown.

If you enter multiple words, then the search will look for a match that contains all of the words. If you click the 'OR' button, the search will match for any of the words.

Click on the  to delete the search and restore the full table.

Column Filtering

The table can be filtered on any column - or combination of columns. Filtering is a way to show only rows of the table that are of interest to you. It is especially useful for creating mailing lists for a subset of your customers or leads.


At the top of each column, just under the column names, are small text boxes that you can type into. You can enter any string of characters and the table will filter upon them. 'Filtering' means that any information in the table that matches your search text is located and then only those rows of the table with matching information are displayed. To terminate the filtering, click on the little 'x' within the filter box.

At the bottom-right of the table, you will see the number of rows that pass the filter. In this example, 19 rows meet the filter criteria and 15 are displayed on the table's first page.


When you have an active column filter, the column name at the top of the column will be colored red to remind you that the filter is active and the table is only showing the rows that the filter permits.  Again, don't forget to terminate the filtering when you are done so that the table restores to showing all its rows.

Filtering Examples


  1. Suppose you only want to see rows of the table with a certain name in the 'Name' column. But you are not sure of the spelling of the name or you only remember part of it. So if the name you are looking for is 'Mike Vasquez', you could enter 'vas'. Any name with these 3 letters will match and only those rows will show up.
  2. The snapshot below is from a 'Job Management' table. Suppose you want to show only jobs done in the town of 'Attleboro' within the last 2 months for fees greater than $200.00.  Here's how you could do that:   Enter 'attl' at the top of the 'Contact Info' column, enter the start/end dates (format: 4/2/19)  at the top of the 'Date' column and enter $200.00 and $1000.00 at the top of the 'Amount' column. Only jobs in the town of Attleboro within the range of dates and prices are then shown in the table. Notice that jobs from a second town, 'North Attleboro', are also shown in the table - this town also matches the 'attl' search keyword.

You can use the Global Table Search and the column filtering together for even greater flexibility.


Thursday, April 2, 2020

Agenda Timeline


Within the Command Center Dashboard, an Agenda Timeline gives you a great overview of everything going on in your business - it provides a chronological list of everything that needs to get done this week.  An example of the Agenda Timeline is shown below.  Notice that it is organized vertically with event cards displayed chronologically to the left or right of circles containing icons.  

There are event cards for
  •   Jobs
  •   Action Items
  •   Quotes
  •   Invoices
  •   Followups
  •   Notes
  •   Call Logs

The easiest way to distinguish between the types is via the colored circle along the center that they attach to.  The Event type is identified by color and by the distinct icons listed above.

Agenda Timeline


You can reverse the chronological order (Monday to Sunday OR Sunday to Monday) by clicking the   icon in the header.  If you reverse the order, the first event of the week will be at the bottom.

Select the type of events you want to see on the Timeline.  By default, the agenda is displayed - all the event types are included on the timeline.  From the pull-down menu, choose the view you are interested in. Click the check-mark to accept your choice and the timeline will refresh itself accordingly - only tasks of the chosen type will be displayed.  Click the 'x' to reject the choice and cancel.


Use the Time Period Selector within the timeline header to choose the time interval you are interested in.  Use the arrow widgets to go forward or backward a week at a time.
  •   Go to the current week
  •   Go to next week
  •   Go to last week
  •   Go another week forward
  •   Go another week backward


The event cards give a summary for the job, action item, invoice, ... that they represent.  For example, a Job card gives the job number, customer name, address, the name of the worker you assigned to the job, the price and the time the job is scheduled to begin.  Click on the blue-colored link to open a job form with greater detail and optionally modify the job.  Double-clicking on the circle will also open the job form.


Wednesday, April 1, 2020

Route Planning

The WorkWell Command Center has great Route Planning capability built into its Mapping application.  The 'Job Locations' snapshot below is an example of what you can expect.  The embedded Google Map shows all the job locations planned for a given worker or crew in the field for the day.  The best travel route between them is displayed.  If you click on a job location marker, you'll see details about the job.  Below the map is a list of all the jobs in order of travel.  You'll notice that the job details - customer name, job start time and address are given.  The travel distance and estimated drive time are given as well.  The travel route is also presented in a Route Timeline format (lower left - bottom of the timeline is cut off and not displayed).

View our Video Tutorial about Route Planning on YouTube.


Map Control Panel

To compute and display routes, first use the Control Panel to specify which job locations to add to the map. It contains a set of widgets for choosing when the jobs occurred, whether your day's Start and End locations should be mapped and allows you to show only jobs assigned to particular workers.
  • Start by choosing a time period via the Selection Criteria.  For Route Planning, you want to choose 'Today'
  • Optionally enter a Start/End location
  • Choose a worker - we want to plan the route for just one person or crew


Click 'Update Map'. Then click on either the  or   icon above the Map.

  •    will generate a route map for the selected jobs and optimize the paths between them to minimize travel time.
  •    will also generate a route map for the selected jobs and optimize the paths between them to minimize travel time. But it will go a step further and actually resequence the jobs if the result is better. For example, it may find that swapping a job scheduled at 3pm with a job scheduled for 11am will result in a shorter route. Of course, you can only take advantage of this level of optimization if it doesn't matter when during the day you actually do the jobs (or that you can call the customer and reschedule the time).


The Route Plan is presented in two ways
  • Route Plan Timeline
  • Route Plan Table
Both Route Plan formats show accurate durations for traveling between jobs. Compare these to the job schedules to be sure the scheduled duration for jobs adequately accommodates travel time.

Each item of the timeline or row of the table represents legs of the day's travel route.  Each leg gives you job details as well as drive distance between jobs and estimated travel time.  WorkWell determines travel distance/time by querying a Google server with the successive addresses in the day's route.

The Route Plan Table can be printed.

If you launch the 'Today Timetable' on the Command Center Dashboard, you can email

Route Plan Timeline


Route Plan Table


Tuesday, March 31, 2020

Charts of Company Performance

The WorkWell Command Center displays charts that illustrate many aspects of your company's performance.  These range from revenue/bookings/profit charts to employee wage and productivity charts to charts that reveal which marketing efforts are most fruitful.

You will find several types of charts: graphs, bar charts, pie charts, and area charts.

Where Can I Find Charts?

Charts Page

Click on the chart icon     in the left column of page icons to go to the Chart Page.  Select the type of chart you want and the number of months.  There are a few dozen charts to choose from.

Quick Looks

At the top of the Dashboard page, the Quick Looks section provides you with numerous charts for Jobs, Customers, Leads, Quotes, Invoices, and Expenses.

The following is an example of a Customer Chart.  Click the     icon to rotate among a collection of Customer charts.  Click on the tabs (there are 6 - in a horizontal bar just under the top) to choose a different class of charts.  For example, click the 'Jobs' tab to see a collection of job-related charts.  Finally, to choose a timeframe, click on the TimeFrame widget at the very top - in the figure below it is labeled 'This Year'.  Click it to choose a different timeframe, like 'Last Year', 'This Quarter', 'Last Quarter', 'Last Month', etc.


Table Views

Many of the tables display a built-in set of charts.  To activate these charts, look for the button shown here.  Just click on it and charts relevant to the type of information in the table will slide onto the page.  For example, if you are on the Customer Tabular View, then the charts will be related to your customers.  If you are on the Services Tabular View, then the charts will be related to the services your company sells.  Etc.

Examples of Charts

Revenue & Profits

For Revenue & Profits you can display up to 6 graphs at once.  Select which graph(s) you want by clicking the checkboxes.  Also, choose how many months you want to cover.  You can get a 'cumulative' graph as well - click the 'Cumulative' checkbox.

Revenue

The Revenue bar chart shows you how much revenue your business produced in a given timeframe, along with how much has been paid, not paid, and how much is not paid and late.


Job Activity

The Job Activity graphs show a monthly view of the number of jobs your company has completed, the number of invoices and quotes sent, and the number of payments that are due or late, etc.

You can display up to 6 graphs at once.  Select which graph(s) you want by clicking the checkboxes.  Also, choose how many months you want to cover.  You can get a 'cumulative' graph as well - click the 'Cumulative' checkbox.


New Jobs

New Jobs is a monthly bar chart of your jobs over the last year.  You can view revenue, average revenue or number of jobs.  

Job Locations

Job Locations is a pie chart that shows you what towns your jobs have been located in.  If you run your cursor over the pie chart, whatever slice you touch will give you a count of the number of jobs in the town that slice represents.

Job Ratings

Track your job ratings.  This chart shows how many ratings you have, the average rating, and how ratings are distributed between 1 and 5 (the best) stars.


Job Sources

This pie chart shows you how these jobs came your way.  Were they the result of referrals from existing customers?  Maybe from visitors to your website.  Others may be the result of any advertising or referral sites you engage with.


Customer Status, etc

This pie chart shows you how many customers are assigned each status type.  You create the status types and assign them to your customers.  You can choose a timeframe - like 'This Year', 'Last Year', 'This Quarter', 'Last Month', etc.  If you run your cursor over the pie chart, whatever slice you touch will give you a count of the number of customers with the status that slice represents.


Who are Your Best Customers?

This bar chart shows you at a glance who your best customers are in terms of revenue, average revenue per job or number of jobs.  You can choose a timeframe - like 'This Year', 'Last Year', 'This Quarter', 'Last Month', etc.


New Customers

This bar chart shows month-by-month how many new customers you have won over the last year.  You can choose a timeframe - like 'This Year', 'Last Year', 'This Quarter', 'Last Month', etc.  For per Quarter timeframes, the horizontal axis is weeks rather than months.

Customer Category

This pie chart shows you what types of customers you have.  These are categories you have created and assigned to your customers.  You can choose a timeframe - like 'This Year', 'Last Year', 'This Quarter', 'Last Month', etc.  If you run your cursor over the pie chart, whatever slice you touch will give you a count of the number of customers in the category that slice represents.

New Invoices

This bar chart shows month-by-month how many new invoices you have issued to your customers.  You can choose a timeframe - like 'This Year', 'Last Year', 'This Quarter', 'Last Month', etc.  For per Quarter timeframes, the horizontal axis is weeks rather than months.


Invoice Status

This pie chart shows you the status of your invoices.  Use this to track how many unpaid invoices you have outstanding - especially those that are overdue or haven't been sent.  You can choose a timeframe - like 'This Year', 'Last Year', 'This Quarter', 'Last Month', etc.  If you run your cursor over the pie chart, whatever slice you touch will give you how many invoices have the status that slice represents.


Worker Earnings

This bar chart shows the month-by-month earnings over the last year of one of your employees.  You can choose any employee.


This area chart shows the month-by-month earnings over the last year of all your employees.  You can see the relative wages of each of your employees.  The aggregate of all the wages is your total payroll.


Services

Want to know which of the services you sell generate the most revenue?  This area chart shows the month-by-month sales of all your services together.  You can easily see if any of the services have seasonal peaks and which are performing well for you.


The pie chart view also shows you the relative sales performance of all your services.  Choose how many months you want the chart to cover and the number of services displayed.  If you run your cursor over the pie chart, whatever slice you touch will give you the revenue from the service that slice represents.


New Leads

This bar chart shows month-by-month how many new leads you have won over the last year.  You can choose a timeframe - like 'This Year', 'Last Year', 'This Quarter', 'Last Month', etc.  For per Quarter timeframes, the horizontal axis is weeks rather than months.

Lead Stage

This pie chart shows you the source of your leads.  It tracks how you initially learned about the lead.  A source could be a referral site like Yelp or Thumbtack, or referrals from existing customers, or people that found you through your website.  You add/remove sources that you can then assign to your leads when you enter them into WorkWell.  You can choose a timeframe - like 'This Year', 'Last Year', 'This Quarter', 'Last Month', etc.  If you run your cursor over the pie chart, whatever slice you touch will give you a count of the number of leads assigned the source that slice represents.


Lead Funnel

The lead funnel provides an interesting way to view your lead stages.  It shows how successful you have been at converting leads into customers.  In the example shown, 17% of your leads are new and you haven't done anything with them other than enter whatever you know about them into WorkWell.  13% of them you have at least contacted.  15% have indicated some level of interest.  16% you believe to be real opportunities.  19% are in the proposal stage - you have quoted a price and are waiting for a decision.  17% are wins - they have booked work with you and can be converted into a customer at this point.